Winter seed sowing is a great way to grow most native plants! The seeds of many native species require cold, moist stratification to germinate. This occurs naturally when a seed falls on the soil and goes through an average Illinois winter.

These conditions can be mimicked in the refrigerator with a moist paper towel or a spoonful of sand, planting the seeds after meeting the required time for stratification of a particular species.
Winter sowing is an even simpler option—great for gardeners of all levels of experience. Planting in a milk jug or other recycled container gives seedlings a head start, as the containers create a mini-greenhouse to trap heat, speeding up germination and protecting seedlings during spring cold snaps, and lets nature work its magic!
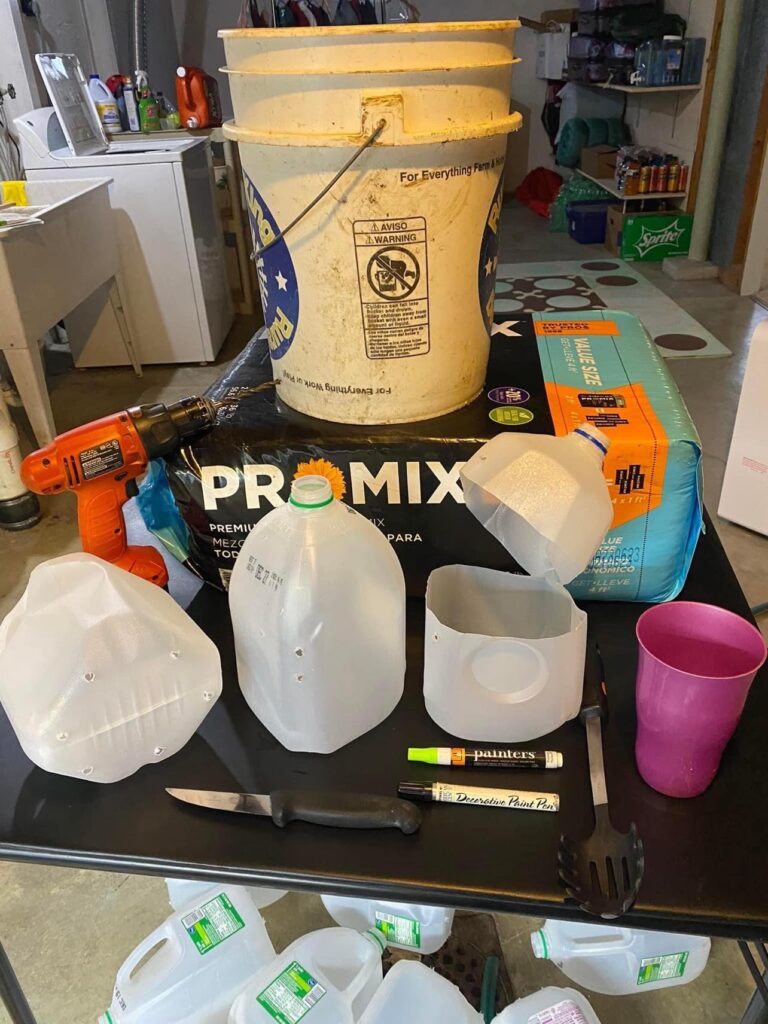
Gather Your materials
-
-
- CLEAN translucent milk jugs, translucent kitty litter containers, or similar containers
- Paint pen (since it does not fade like most permanent markers) or labels (we use recycled blinds with pencil)
- Potting mix (Pro-Mix, Miracle Gro, or some other good quality medium that will allow for good drainage)
- Scissors or box cutter
- Drill and a block of wood, or a hot glue gun (w/o glue!)
- 5-gal bucket or other container to mix soil with water
- Pipe cleaner/twist tie or duct tape
-
Prepare the container
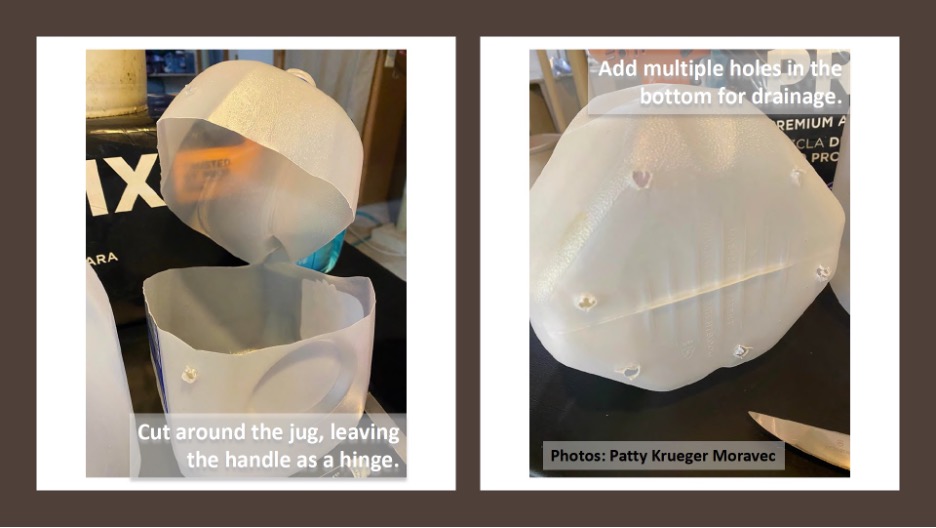
Partially cut around the middle of the jug, leaving the handle section intact for a hinge. Cut high enough to leave room for 4+” of potting mix. Two holes can be drilled in front if opting to use a pipe cleaner or twist tie for closure. Skip this step if closing with duct tape. Add holes in the bottom for drainage. There is no set amount, but you do not want the jug holding excess water. Set the jug on the block of wood and drill scattered holes using a large bit.
Fill with potting medium

Pour some potting mix into the 5-gallon bucket and moisten slightly. It should hold together if you squeeze a handful, but not be dripping wet. Fill the jug with at least 4” of potting mix, pressing down lightly.
Label
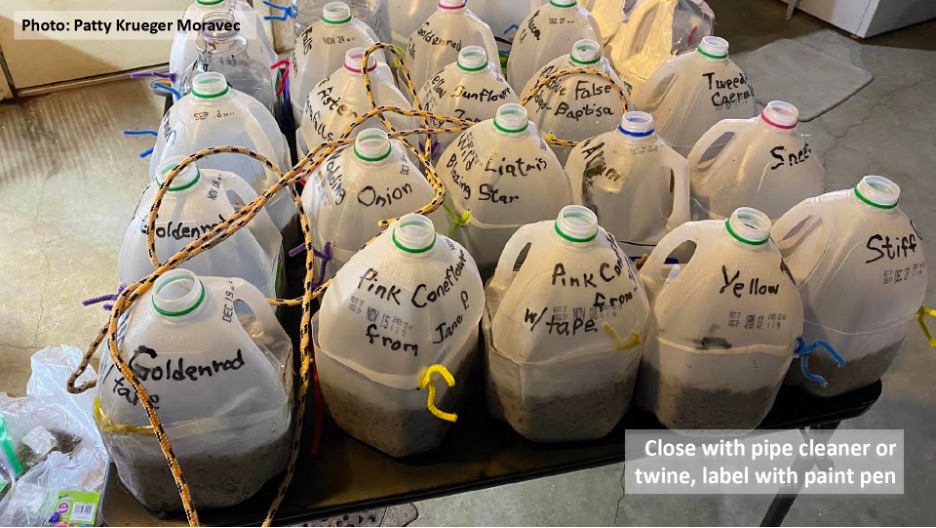
Label the jug with the paint pen or add a label inside the jug, then plant the seeds as directed on the package, pressing lightly into the potting medium. Close the jug using a pipe cleaner or tape. Leave the milk cap off to allow exchange of air and moisture.
Water and Secure
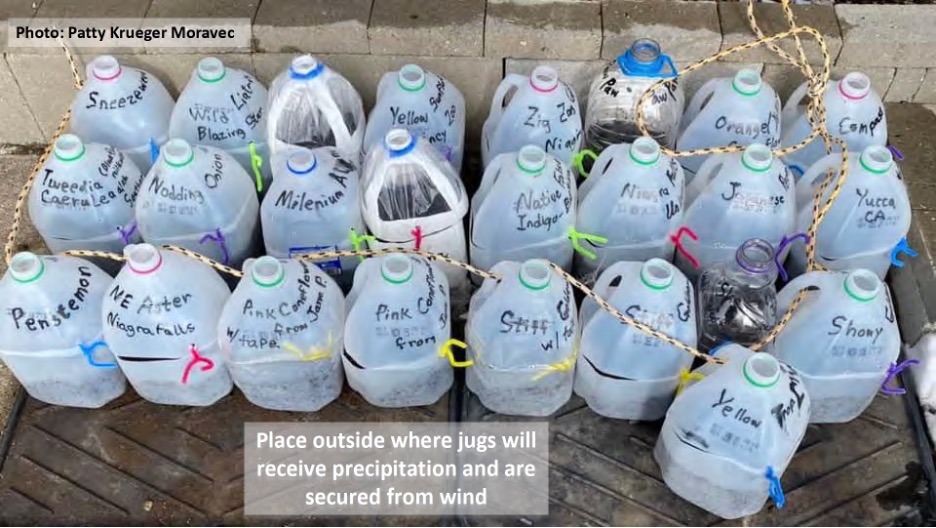
Water lightly and place the finished jugs outside in a sunny location with some protection from wind. This could mean running twine through the handles to tie them together, placing in milk crates, framing them in with boards, cement blocks, etc.
Continuing Care
As temperatures warm in the spring, check moisture levels periodically. They may need supplemental watering if there is not enough rain or snow to keep the soil consistently moist. Placing them on a boot tray can help them stay consistently moist but still allow for drainage.
Jugs can be opened on warm days and closed at night to protect seedlings from freezing temperatures. When temperatures are consistently above freezing, the tops of the jugs can be opened or cut off, allowing the plants to grow until ready for transplanting.
Transplanting seedlings into garden
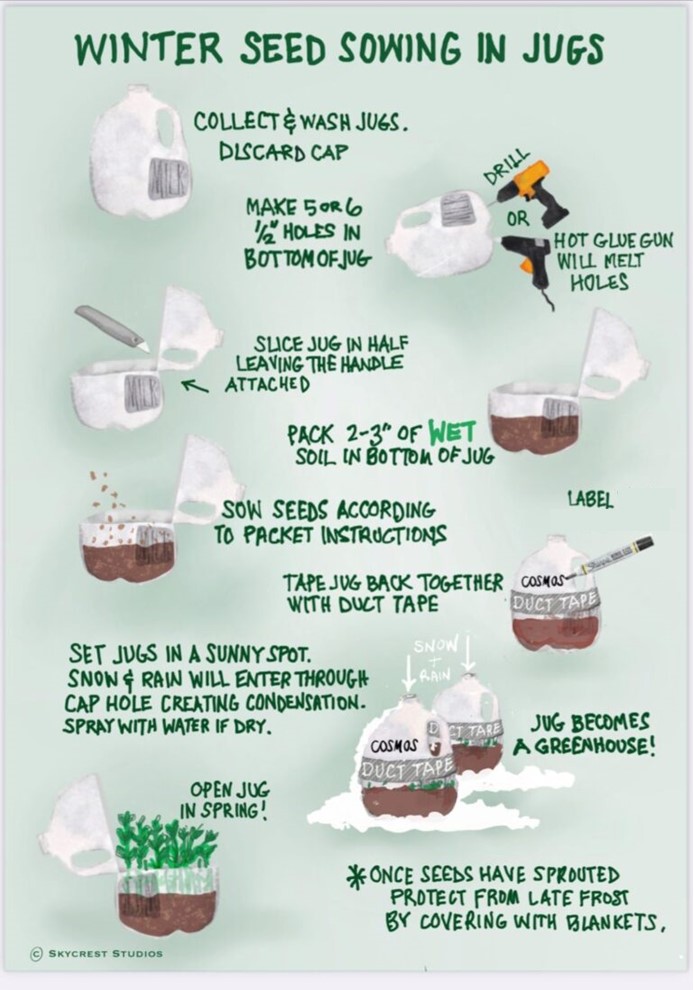
Winter Seed Sowing at a Glance
Resources